12/12/12

T-Shirt Quilt

Last week I made a t-shirt quilt for a customer using her husband's shirts.  It turned out quite nicely, if a bit plain.  The black that she chose really makes the colors in the shirt graphics pop.
 
At first I didn't like making t-shirt quilts, but as I have had more practice, they have really grown on me.  I doubt I will be making them for my children because they tend to wear their shirts out.
If you make one of these quilts, remember that the interfacing for the t-shirts is key.  It has to be the stretchy kind.  And when quilting, raise your foot a little to make sure you clear the fabric and seams. 

12/7/12

End of the Journey?

I am calling it done.  Except I forgot to put on the label I made.  Please leave a comment!  Positive, negative, suggestions, observations, anything.  I love feedback, it's how I learn and grow. 

This was definitely a learning experience.  And I must say, the finishing (border, backing) was the most difficult part.  Much more so than making and embellishing the blocks.  Before you read further, I do not receive anything for linking to store sites.  I simply do it because I like to know what people use and where they get their supplies, so I assume others do, too. 

I tied the quilt with Petunia 2mm silk ribbon, hiding the the knots.  I went through the backing and the foundation fabric because I did not want the ribbon to show on the front.  I buy most of my silk ribbon from silkribbon.com.  Their ribbon takes dye very nicely.  They are reasonably priced and ship very, very quickly. 

This is the "soaring bird" from Urban Threads.  I also have the "floral fascinator" on another block, but the picture came out way too fuzzy.  You can see it in the top right corner in the picture of the whole quilt.  This was my first foray into Urban Threads freestanding lace designs and I am very happy with the results.  I bought a few other downloads that I am looking forward to making up.

I also purchased several pieces of lace from Sew-Biz Fabrics to dye. They are very reasonable and also ship very quickly. For someone who lives in the middle of no where, that is super important. These I finished with buttons from my small stash (hand me downs from grandmothers and other places), from Roxann, and from my aunt. Check out the cameo button from Aunt Tricia. It is my hands-down favorite.

11/26/12

Things to be Thankful for:

After a rotten weekend of being sick (congestion, allergies, cold, etc, whatever), I thought it important to regroup and remember what I was thankful for on Thanksgiving.  It already seems like sooooo long ago, but laying around in bed for two days will do that to a person.  I didn't spend time doing anything creative!  Not even planning something in my head.  What a sad waste of quiet time.

I am thankful for my children, who are finally old enough to realize that leaving me alone when I'm sick is in everyone's best interest. 
I am thankful for my husband.  No, really!
I am thankful for the roof over my head and the fact that we both have a job.
I am thankful for my family and friends, both in person and cyber!
I am mostly thankful for God, who has blessed me with a creative mind and full heart. 

I am also thankful that the ribbon I ordered to tie my quilt came in today!!  It is 2mm silk ribbon in "petunia" from silkribbon.com.  I notice that now, after I've ordered, of course, you can get 15% off until December 2nd.  I have enjoyed using their Cam Creations silk ribbon in both the colors and the white that I have dyed. 

I hope the colors come out right on your screen.  This is the backing fabric, a golden green, with the rich, bright pink silk ribbon.  I have decided to tie off and try to hid the knots.  I am also going to try to just go through the foundation fabric instead of all the way through the front of the quilt.  Cross your fingers for that!  And thanks to everyone who had a suggestion or comment, either on the blog or my facebook page. 

11/19/12

No News is Not Good News

I know, I haven't blogged in a while.  I am really stuck on the crazy quilt.  I finally have the back on and now I need to pin it and tie it.  Decisions, decisions.  Do I tie to the front and risk making the embroidery look messy?  Do I tie to the back and leave the little ends?  Do I try to hide the ends?  Do I match the thread to the backing?  Do I use something that contrasts?  Argh!!!!!  I don't need this pressure!!!

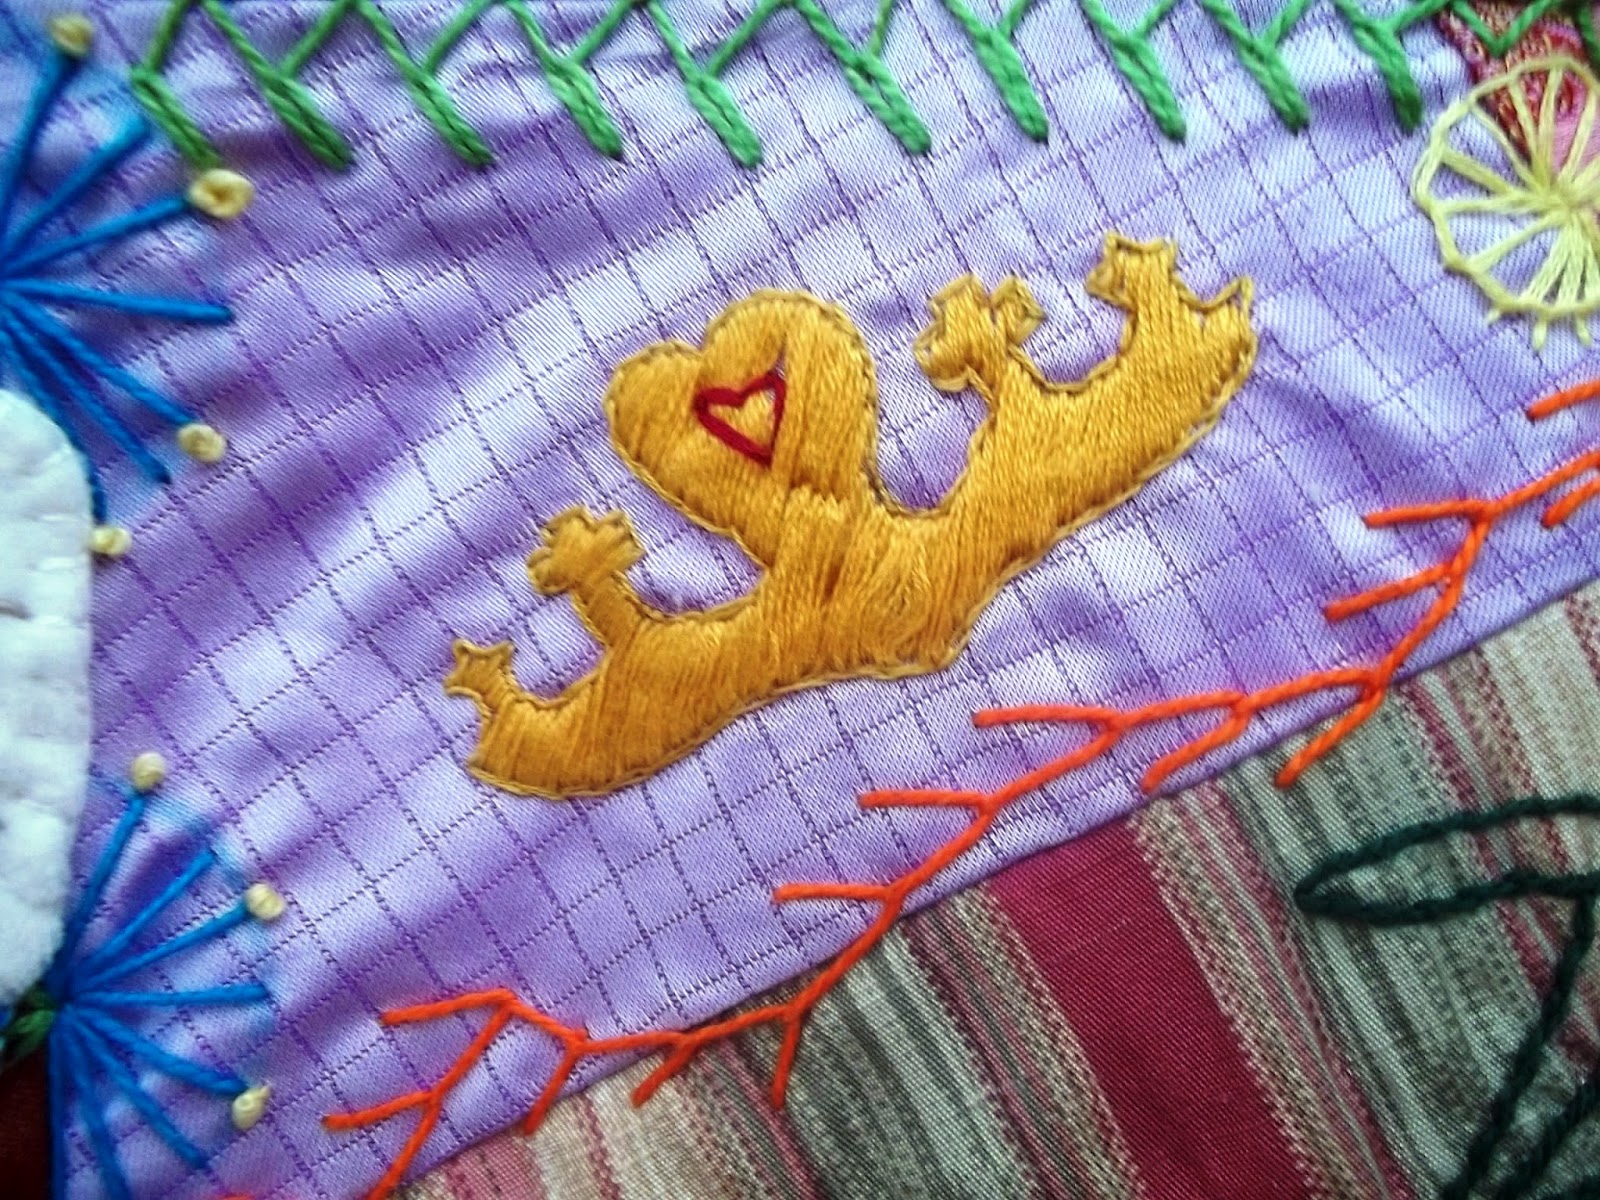
This is where I am now: 
As you can see, it really needs pressing and, of course, the tying.  The colors are so much more vivid than they look in the picture, or maybe it's my screen. 

In the middle of the madness, I am working on a customer's t-shirt quilt, which is really the main focus.  I like quilting for others and I really like making the extra money, especially at this time of the year.  But this darn crazy is making me, well, crazy!!

I am entering it in the Corpus Christi quilt show in February of 2013.  Just because my husband said it was ugly. 

And in the midst of all the hair pulling over finishing the darn thing, I have discovered the Crazy Quilt Journal Project for 2013.  I am seriously thinking about doing this.  It is a sickness, is it not?  There is no prize, just people around the world committing to making a crazy quilt block no smaller than 6" square of 36" in area each month for 12 months.  Simple, right?  Well, in theory it should be.  But now I'm obsessing on a theme.  And a block size.  I don't even want to consider how I will put it all together at the end. 

What do you think?  I am not making anything as big as my current project.  It will likely be a 9" block to make a simple wall hanging or table topper.  I have considered putting the twelve blocks around a themed center and I have two ideas for the center.  One would be the large piece of peacock lace that I wanted to use on the current quilt.  It is about 18" tall and 8" wide.  I would love to use that thing, but I have a lot of peacock stuff on the this quilt and I am not sure I want to do the same thing on the next. 

The other idea is to use something from Bonnet Girls as the center.  I have had one of Helen Scott's book forever (years and years) and have not used it.  Another thing on my list of stuff to accomplish.  Some people's bucket list has bungee cords and trips to Antarctica.  Mine includes a crazy quilt and a lone star. 

Of course, there is also Brian Haggard's new book, Embroidered Memories that I can't wait to see.  I could make a monochromatic design with more of a aesthetic, Eastlake feel to it. 

And because I love all things Victorian, a quilt focusing on things likes hats, shoes, and other accessories would be really cute. 

Last but not least (ok, probably not really the last, either), is something featuring needle tatting in the center. 

Please, please leave a comment and give me your ideas and feedback!! 

10/25/12

The Saga Continues

Hello from the insane asylum!  Just wanted to keep you updated on my non-progress on the crazy quilt.

This is what it looks like now:

This is my trusty seam ripper, almost down to the nub:

And this is me, with blood dripping seam ripper and all my hair standing on end with red eyes:
In other words, I'm having trouble getting the the stupid thing square with the borders on and the back straight.  I will be ripping again tonight.  I am determined to get the back on soon.  Yes, I know "soon" isn't exactly a deadline, but so many things (read "life") happens around my house that I have to take my moments to sew and rip where I can.  I have to take a picture of the monstrosity to enter in a February show.  The entry is due November 8th.  I don't think they will accept that top picture. 
Keep the quilt and me in your prayers! 

10/19/12

The Last Two Blocks

The last two blocks are finished!  Go, me!!!
Emily's:
The colors wouldn't come out right when I uploaded the picture.  The pink is actually a very pretty rosy pink, the check on the left is a light lilac, and the green at the top should be a nice sage.  Oh, well.  I'm a quilter, not a photographer.  I made the little lace lamb on my embroidery machine using this design from Embroidery Library.  I needle tatted the green and pink lace pieces and also made my own cording that I couched for the staff.  The '97' is made with French knots.

John Ross':

Ignore the basting stitches on the right corner, please.  Those will come out soon.
The crown of thorns was done by couching another cording that I made.  The couching stitches are meant to look like red thorns.  I also dyed the lace yellow. 

I have been working on adding the borders.  More on that later.  I am trying to come up with a name for the quilt so I can enter it in a show.  I was thinking 'Inspirations' and then Roxann threw in 'Desperation.'  So...Inspiration and Desperation?  Inspired Desperation?  Desperately Inspired?  Blood, Sweat, and Tears?  I Can't Believe You Wasted 14 Months of Your Life?  Suggestions?

10/15/12

Dia de los Muertos...in my style

Dia de los Muertos is literally "the Day of the Dead."  It is a Mexican holiday that ties into the Catholic All Saints Day and All Souls Day.  People celebrate their dearly departed loved ones by having parties, cleaning graves, and making altars for the deceased.  It is also a big business for those selling sugar skulls and dressed skeletons. 

Lisa's Bride:  A new addition to this year's Halloween yard display
While I do not celebrate this day, three of my bests (two friends, one cousin) collect and display all sorts of paraphernalia dedicated to the phenomenon.  So, in honor of my buds, I dusted off the embroidery machine and made lace skulls (the lace is where the 'my style' comes to play).  The design I used is from Embroidery Library
I was having the worst time with snarls and machine repairs and wasting thread, time, energy, and water soluble stabilizer until I finally tried changing the needle for a smaller one.  Problem solved.  I feel like an idiot because I wasted a lot of stabilizer and thread, and that stuff is not cheap.  Lesson learned, though. 
So, in honor of the special strange people in my life, I added the olive and pink skull to the crazy quilt.  I also finished the last of the corner blocks this weekend, but that is for a different post.  Last night I tried adding borders but realized that this thing is way too skewed and had to remove them.  I will need to do more squaring before I get to that point. 

10/8/12

Almost There!

I finally decided on the design for the corner blocks on the crazy quilt, and have even finished two of them!  All four will be 6" finished fan blocks.  Each will have a name of one of my children and their birth year, and the 4th has my husband and my name and the year we were married.  Each of these blocks will also have a religious symbol and none of the blocks will have a fabric that is on one of the others.  Enough rules?  Oh, there also has to be some chartreuse to match the other blocks. 
Here are the first two:
I really didn't mean for this block to seem quite so pink, even though green and pink are my favorite colors, but it sure came out that way.  The 90 and heart are done with a chain stitch.  I made the doves with my embroidery machine and appliqued them on. 
Each wedding ring is stem stitched with three rows.  Then I wrapped each with 18K gold thread.  It has a pretty sheen in person that I just couldn't capture in a photograph. 
 
Our oldest daughter loves purple and turquoise, so the background is turquoise and the 91 is purple.  To keep some of the quilt's signature green in it, I dyed the lace and also used a green velvet for the fan handle. 
 
She chose the "Jesus star" for her motif.  I finished it with needle punch and really like how it turned out. 
Block #3 is together, but I haven't started embroidering yet.  So much to do, so little time!  I really am determined to have the whole thing finished by Christmas at the latest.

Please comment!!  I love comments!!


9/25/12

The Best Laid Plans...

Sigh.  Yesterday morning (a Monday, no less!) I got ready earlier than usual and went outside at the first light to take pictures of some additions to The Quilt and a few of all the blocks together.  Then I downloaded them onto my flash drive along with some other stuff from the weekend.  At some point I deleted them.  All of them.  The entire folder labeled "crazy quilt."  Every single blessed picture from the beginning is lost.  It makes me sick.  Of course, it's not as bad as losing the actual quilt!!!!  But still, it is maddening. So here we are on Tuesday, trying again. This time I at least got them on the blog! Cross your fingers that nothing else happens.  This time I took the pictures in the evening, but it was so windy most of them came out very blurry.  These are the best:

Mind boggling, isn't it?  There are twenty total blocks, ten of which have pictures.  They arranged so that the picture blocks do not touch.  In some cases I moved around items that had been appliqued, like two of the saints and their frames, and some of the small lace pieces.  I added the rooster and frog lace and still need to find places for a few of the other lace pieces. 

This is my shell and holy water to represent baptism.  The shell is appliqued from white velvet and the water is made of french knots from variegated thread. 
The satin stitched crown is in honor of my friend, Lanita.  Lanita passed away in April of 2011 from breast cancer and continues to inspire me today.  She was always smiling and serene even when she was in the worst pain.  Lanita was creative, down to earth, and an awesome mother.  When she decided to shave her hair instead of watching it all fall out, she had a shaving party.  All of her friends were instructed to bring "something to wear on her head."  She meant a hat or scarf, of course, but I took a tiara.  My favorite picture is of Lanita with a wig and the tiara. I thought of adding a breast cancer ribbon in her honor on my quilt, but the tiara means more to me.

I got my punch needle last week!  It was confusing at first and I am still not comfortable with it, but I managed to decorate my son's picture and make a peacock feather.  I will need more practice.  The feather is my own design.  Actually, I still have a real feather in my purse that I was looking at for inspiration.  I love peacocks. 
Speaking of my adorable son (and this picture was when he was almost two and he is now thirteen), I added a bit more to him.  The spokes of the wheel have been picked out in brown stem stitch and the red stripe with the same stitch.  Then I added a brown silk ribbon belt, tiny blue belt loop, and buckle using real gold thread in a satin stitch.
I am now working on four corner blocks and then will put on the 6" border.  Maybe it will be finished by Christmas.     


9/17/12

Kay's Kreation

Today I am tooting two horns!!  My friend and coworker, Kay, has been watching me work on my crazy quilt, and seeing my other projects, for over a year now.  She expressed interest in learning to embroider over the summer and we talked about how she could get started.  Now, we both tried our hand at crochet that another coworker tried to teach us last year.  That didn't go so well for either of us. 
So I bought Kay an Aunt Martha's transfer to practice with and then she got another and off she's gone!  This pillowcase is her first project:

She is going to make another matching one, possibly with the red and yellow reversed for some extra interest.  Her next project is an appliqued and embroidered shirt for her daughter.  She's picked out an adorable cat motif for that.
I am so proud of Kay for finishing the pillowcase in such a short time, and bursting with pride (ok, I teared up) that I have taught someone a skill that is quickly going by the wayside.  She really loves it and, since she's semi-retired, has time on her hands.  Kay's first love is gardening, but with our scorching summer that lasts until mid-October, you can only spend so many hours outside.  
Speaking of my crazy quilt, I am still finding new areas that really need just a touch more embellishing and I still need to make the corner blocks, but I hope to have something up here soon.

9/7/12

Another Idea for Recycled Memories


I no longer do general seamstress or tailor work for my customers, preferring to work on quilts.  But when an old customer called with an unique request, I was happy to oblige.   It seems that Heidi's niece, Rebeccah, passed away after having suffered through many health problems.  Rebeccah's mother was her constant caregiver throughout her 20 year life. 

Rebeccah had a quilt that she used all the time that was well loved and worn out.  Heidi salvaged the plates that she could from the quilt and asked that I make a tote bag and pillowcase from them that her sister could use in her travels. 
I used the blocks with the brightest colors to applique.  Heidi chose an inky blue print for the main fabric and plain muslin for the lining.
I modified the bag pattern that Heidi had purchased so that it would be large enough for the plate.  The plate is machine appliqued to both sides.  I chose not to line it with a stiffener so that it can be easily crushed and thrown into a suitcase or another bag as needed. 
The pillowcase is folded back on itself.  What you are seeing below the applique is actually the opposite end of the case when a pillow is inserted.

For the pillowcase I cut one of the plates in half and appliqued it to the cuff.  I make my pillowcases with french seams using the directions on about.com.  For this particular pillowcase I did not add the trim as suggested because it would have interfered with the applique. 
I think this is an awesome way to reuse a memory or a "cutter" quilt and I appreciate being given the chance to work on the project. Many times we are afraid to cut into something but the projects I have been blessed with lately show that more use can be made out of the things we are holding onto, stuck in a closet somewhere out of sight, if we use our imagination. 
How have you recycled a memory or cherished object for more modern use?

8/30/12

Nearing the Finish Line!!!

Finally, number 20 is complete!  I think it still needs something, but I'm not sure what yet.  It will come to me eventually.
The Tiffany blue brocade and lace are from my aunt's wedding suit back in the 60s.  The dark blue (it looks black in the picture) is from my uncle's dress blues that he wore for the wedding.  He was in the Navy and is a Vietnam Veteran.  I feel very, very blessed to have these fabrics but I'm not sure if it's because Aunt Tricia cut up their wedding outfits for me or because I have his uniform, a true piece of our history.  It's very humbling.  My aunt inspired me to start quilting.  She is very, very creative with a needle and thread and has unwittingly challenged me to change, adapt, and improve in my own little fabric world.  This is not to say that we are the same at all, but we do appreciate each other's work.  Aunt Tricia's quilts, and decorative clothing, is generally super bright and very modern, except for her work with buttons, neckties, and yo-yos.  (She is being featured in an upcoming issue of Belle Armoire.)  I tend to be much more traditional and while I enjoy pops of brights, I lean toward spring and fall colors. 
The brown floral, black cat, and turquoise paisley are from my cousin Tommie Sue, whose favorite colors are orange and turquoise.  Can you tell?  One of TS' jackets was in the Valentines issue of the same magazine this year.  I'm thrilled for them both to have been published, as well as extremely jealous!
 
I have never worked with wool before.  It sews nicely, but does it ever attract every snippet of thread and anything else!  How in the world do soldiers keep themselves looking as handsome and neat as they do?  It boggles the mind.  Anyway, the eagle pattern is from the Q is for Quilter blog that I found a few days ago.  I just had to play around with the size and transfer it to my water soluble stabilizer.  The USA is free hand.

My strawberries are satin stitched.  Didn't I say a long time ago that I was NOT going to satin stitch again?  Ah, well.  They turned out nicely.  The pink flowers to the left are silk ribbon and done in a lazy daisy stitch, as are the leaves.
 
Tommie Sue's Halloween cat was cute but needed something.  I picked out his whiskers, eyebrows, mouth, and ear hair with a single strand of gray.  There is satin stitching on the solid orange of the striped fabric he is wrapped in and black backstitching.


My lucky horseshoe full of flowers is tatted.  Some of the flowers I had laying around and can't remember where the patterns came from (sorry to anyone I have offended).  The horseshoe came from Be-stitched.  This is a very cool site with lots of different motifs well beyond the general doilies and edgings.  This arrangement didn't come out the way I envisioned, but I'm not sure what to do with it so it's staying as-is.
 
I finished the block last night and stitched it to some of the surrounding blocks early this morning.  Hopefully next week I will be able to share pictures of all the blocks sewn together, before the border is added.  I found the perfect fabric for that last weekend while shopping for school clothes.  I know, the fabric store is not the first place most people think of these days for school clothes.  But after spending that much time shopping with my little teen angels, I deserved a mommy break.
 
Comments?  Suggestions?

8/24/12

Finished Recycled Clothing Quilt

Hi, happy quilters!  If you are just joining me, you'll want to peek back at the last post to see the recycled quilt in progress. 
And, ta-da!  It's finished and delivered:
I apologize if the picture seems a little bleary.  I took it at 6:45 this morning when I was still a little bleary.  It finished out at 72" X 90."  There are twenty 18" blocks. 
I left the ruffles on the collars and skirts loose to add dimension.


And I put the bows and buttons back on the bodices.


The hardest thing about the quilt was appliqueing the pieces on, working with the thin/worn knit pajamas, and quilting through the really thick pieces.  All in all though, it was a very worthy project and turned out to be really cute with little planning.  I would recommend this project to anyone with lots of baby items and little room to store them.


8/23/12

Recycled Clothing Quilt

This is the latest quilt-in-progress.  A local lady brought me several of her daughter's dresses and various baby clothes and wanted them incorporated into a quilt.  I forgot to take a picture of the outfits before I started cutting into them.  I usually get excited about a project and forget to take pictures before beginning. 
I purchased the green and white polka dot and the white and green stripe to give some continuity to the quilt and in case I ran out of usable clothing scraps.  Everything else is from an outfit.  Dress skirts, even those for little girls, gives an amazing amount of fabric if you cut carefully.  In some cases I was able to use the lace or ruffle around the hem on the quilt.  I also cut around collars and bodices to applique.  There is no pattern and I really didn't use rhyme or reason when assembling the blocks.  Whatever fit went into a particular block, making sure that there was only one piece from any particular outfit in each block.  Then I laid them out to determine placement.
The little pajamas were appliqued onto bigger squares.  Anything with a ruffle, including skirts and collars, was left free.  I think it adds interest. 
This is a purse that came with the sunflower dress.  It was appliqued in it's entirety.  When I am finished with the quilt, I will attach some of the bows and buttons that were on the clothing, probably in the solid blue areas.

I made twenty 18" square blocks to make the full size quilt.  I chose not to use a border as I wanted the clothing to be the focus.  It has been quilted in a large meander since the last picture was taken and I am in the process of binding it with the green polka dot, which should act as a frame for the quilt.

8/17/12

A Glimpse

This week I've been busy putting blocks together, embellishing the seams between them, and moving and adding motifs within the blocks.  While I'm only showing two things today, rest assured that much more was done behind the scenes!


This is my take on the Sacred Heart.  I saw something similar on one of the quilts in Crazy-Quilted Memories by Brian Haggard and decided to design my own.  After drawing it, I traced it onto the water soluble stabilizer and embroidered using buttonhole, backstitch, straight stitch, and french knots.  I obviously did not soak off the stabilizer before I snapped the picture.  Mr. Haggard's designs strike me as more Eastlake-ish (not a word, I know) in form.  Since I love Eastlake and aesthetic, I find his work very interesting.  As a matter of fact, as I write this and look at these pictures, I see a few other of his inspirations that I've followed.  Note the wagon wheel on the top left of the picture below (the rest of that design is also inspired by Haggard) and the blue triangular seam design on the top left.

This spider and web are stitched between two joined blocks.  I love, love, love how it came out.  I made the spiderweb first and then searched online for a tatted spider pattern.  This is from be-stitched.  I chose turquoise for the middle of the spider because the suggested red (black widow) was just too scary for me. 

In Victorian times, a spider in the home was a sign of good luck.  I think the husbands just told the wives that so they wouldn't have to be bothered with killing spiders.  So, much like pineapples and other positive traditions, spiders were added to crazy quilts. 
Stay tuned.  Next week I hope to have the last block finished.  I'm still searching for the perfect fabric for the border of the whole quilt. 

8/9/12

Blood, Sweat, and Tears

This block really has been all about blood, sweat, and tears.  The blood starts with my poor sore fingers.  For some reason, it has been a particularly rough week with the needle and I've never been comfortable with a thimble.  I have an aversion to things that confine, like shoes, gloves, and thimbles.  Chalk it up to claustrophobia, but this week I kind of wish I had learned to use the thimble years ago.  To top it off, I burned two fingers and a thumb (different hands) at lunch time. 

Remember what the block looked like last week without the embroidery?  It's quite a change, eh?  First up is the lace purse.  The lace was from a vintage lace sleeve from Roxann.  I hated cutting into it, but this way I can see the beauty instead of being stuck in a box. 
To the right is my take on a hibiscus, embroidered on top of a sliver of tropical barkcloth.  I used to wear a lot of Hawaiian shirts. 
Here is my pocket watch appliqued from a piece of very pretty silk.  Ignore the purple marks, please.  That's just from the disappearing ink that hasn't disappeared.  I am planning to extend the chain into the next block when they are sewn together.  And yes, there is significance in the 3:00 time stamp.  The very pretty olive, beige, and rose fabric (which is also the softest thing on this quilt) is picked out with plain brown backstitching on the brown lines in the fabric.  It's subtle in the photograph, but very nice on the real thing.

This is where the tears come in.  Every time I located the peacock, it would disappear again.  Really.  I lost this thing at least 6 times.  I was so relieved to finally get it sewn on.  See the blue velvet it is mounted on?  I embossed that with a peacock feather rubber stamp, but you can really only see one of the feathers now. 


My corset mannequin took some doing.  I bought a stamp when out of town this weekend along with a set of dye markers.  Then, after coming home, realized that I didn't have the right stamp ink to apply it to my fabric.  Did I mention I live int he middle of nowhere?  I finally traced the design, embroidered it to the block, then filled it in with dye markers.  The flowers are those chiffon and tulle things I made before with the candle.  I like the outcome, but I still wish I had the right stamp pad.

One more block to go.  I don't think I will have it done for a couple of weeks due to time constraints, but next week I will post what the blocks are looking like sewn together.  I have ten together so far, but I am going to give my fingers a chance to heal before finishing the joining embroidery on them.

8/3/12

Little Bits of Randomness

Last week I had fun making lace with the embroidery machine.  All of my lace patterns are from Embroidery Library or Secrets of Embroidery.  Just search for "freestanding lace." 
These are some of my results:
green owl


brown rooster with lime bobbin-should be an "oops," but turned out very pretty

green frog with white bobbin


My favorite is the peacock (of course).  Like the others, it was designed to be sewn out in one color.  By watching very carefully I was able to switch out threads and come up with my masterpiece.  The dark color that may look brown is actually a deep plum.  The whole thing needs to have some more of the bobbin clipped, but that isn't nearly as much fun as the sewing.

I also assembled 3 sets of four crazy quilt blocks and have done the embroidery on the seams of two of the sets.  I've been worrying that they wouldn't fit together well and decided that the only way to stop worrying was to try it.  They work!  I haven't taken pictures of that yet.  Don't want to spoil the surprise.

This is what block 19 looks like without the embroidery.  I was going to take before pictures of all the blocks, but I was too anxious to get started that I only have pictures of one or two. 

Of course, crazy quilting is what I do in my free time.  I am currently working on a quilt using a young lady's baby and little girl clothes and dresses.  Hopefully I will have that top finished by next week and I will post a picture.  It's really cute so far.  The biggest challenge is the fabric availability.  I'm not sure if there will be enough for the twenty blocks I'm trying to squeeze out of it.  Otherwise I will have to add a border.  Not a problem, but not what I envisioned.